Introduction
If you can’t log in on your server regularly you can use KVM to remotely access a console on your server, even to set up your BIOS or RAID controller. KVM may also be used if you want to manually install an OS from an ISO.
Prerequisites
- You need to have your KVM login details available. Those details can be found on my.snel.com on the service details page.
- You need to have the Java Runtime Environment (JRE) installed. Visit www.java.com and install it if you don’t have Java installed already.
Step 1: Log in to KVM
Log in to the KVM web interface

Use the KVM login details to log in. You may get a warning about the Java Runtime Environment even if you have it installed. Make sure you have the latest version installed and ignore the message by clicking on “Cancel”:
Step 2: Open the KVM page
Open the KVM page
This step depends on your server model. On SuperMicro servers click on “Remote Control” -> “Console Redirection”:
You may get another warning about the Java Runtime Environment, ignore again by clicking “Cancel”.
On Dell servers, there is a shortcut to launch the console on the main screen so you don’t have to click on anything yet.
Step 3: Launch the console
Launch console (SuperMicro servers)
Click on “Launch Console” button on the “Console Redirection” page. Either Java Web Start will immediately start the console or you will be asked to save the file. Save the file and run it afterward.
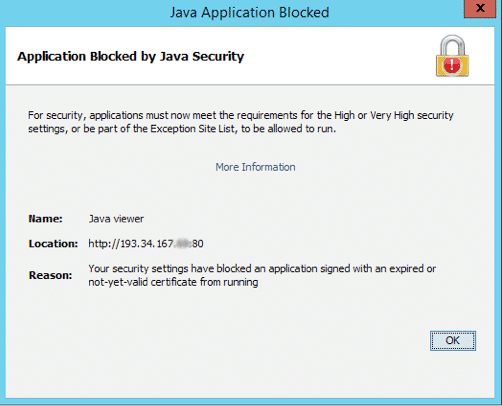
You may get a warning about Java Security:

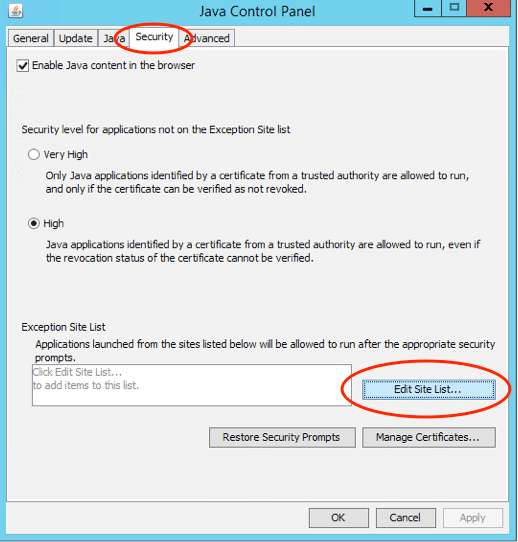
Click on OK and make note of the location. You need to add an exception for that location, so go to your Java Control Panel (search for “Configure Java” in Start on Windows), then go to tab “Security” and click on “Edit Site List..”:
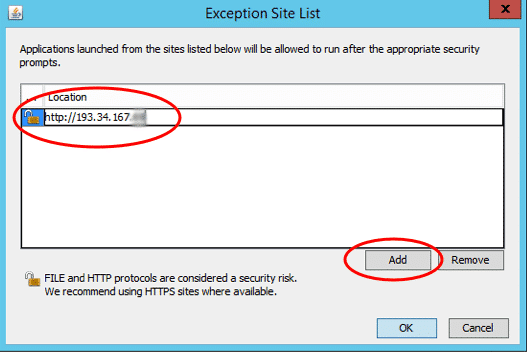
In the “Exception Site List” window click on the button “Add”, enter the location you noted earlier and press “Enter”:

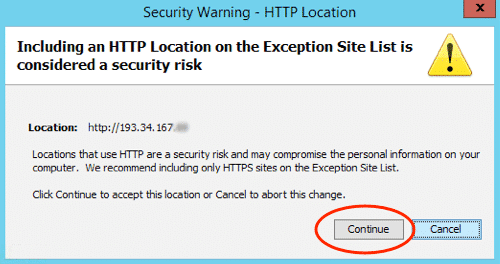
You will get a warning, click on “Continue”:
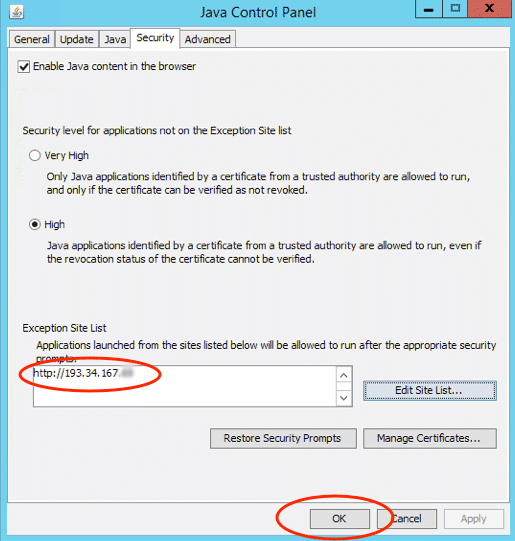
Check that the location you entered is in the “Exception Site List” and click on “OK” to close the “Java Control Panel”:

Step 4: Run the file
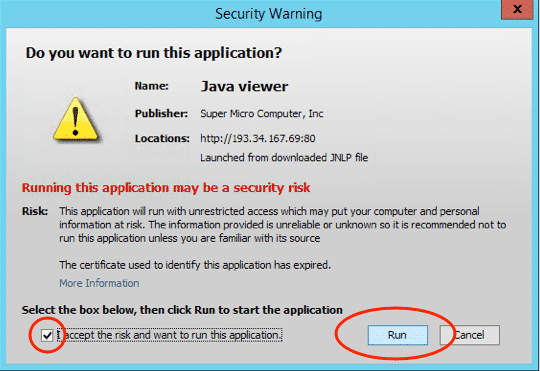
Run the file you saved earlier again (or launch again from web interface). You will get another warning, check the checkbox in front of “I accept the risk and want to run this application.” and click on “Run”.
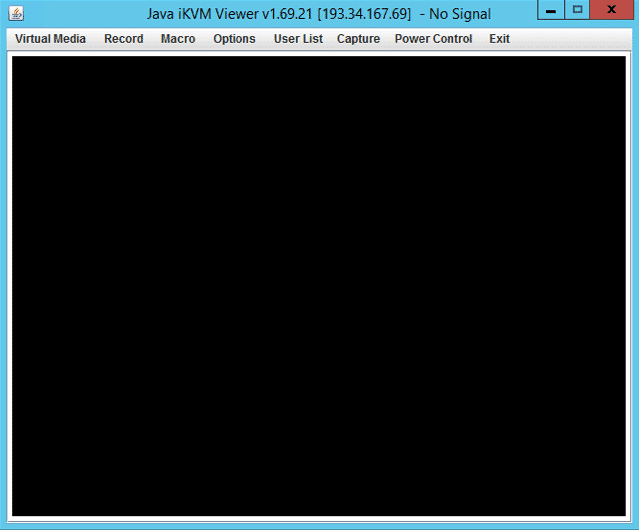
If all goes well you will be connected and presented with the following screen.
It is possible that an Error pop-up shows up. Like below
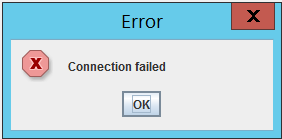
In this case, you will need to reset the BMC and wait a couple of minutes. After which you can repeat 3a to relaunch the KVM viewer. You can reset the BMC in your client area.
Log in to your client area and click on the service of which you would like to reset the BMC.

Navigate to the “KVM Management” tab and click on “Reset your KVM”.

It can take a couple of minutes before the service has been successfully reset.
Step 5: Launch console for Dell Server
Launch console (Dell servers)
In the main screen (or in the menu “Overview” -> “Server”) click on “Launch” under “Virtual Console Preview”:
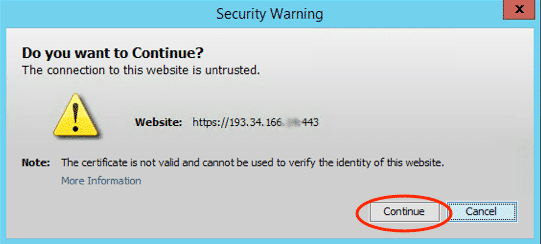
Either Java Web Start will immediately start the console or you will be asked to save the file. Save the file and run it afterward. You will get a Security Warning, click on “Continue” to proceed:
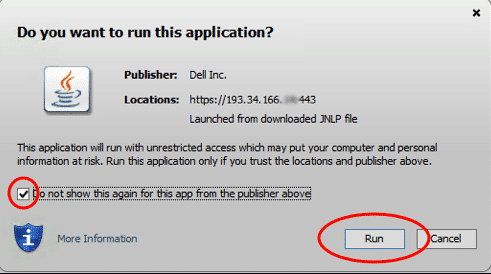
Another warning will be presented, check the checkbox in front of “Do not show this again for this app from the publisher above” and click on “Run”:
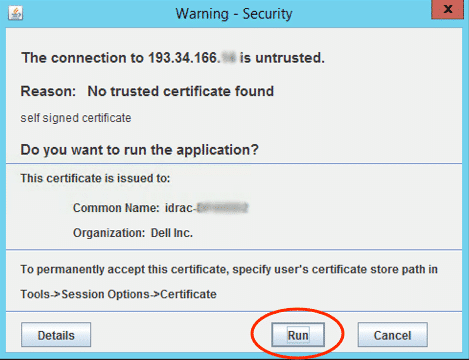
Last warning about the certificate, click on “Run”:
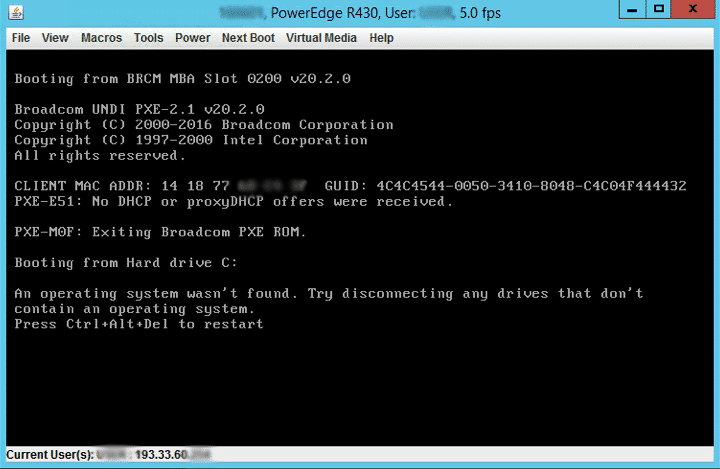
Finally, you will see the console.
Conclusion
Congratulations, you have learned how to remotely access a console on your server by using your KVM.





Leave a Reply