Introduction to Immutable Storage in Acronis
Immutable storage in Acronis provides a secure way to store backups by preventing any modifications, deletions, or tampering during a specified period. This feature protects data from unauthorized changes and ransomware, ensuring cloud backups remain intact. Users can access and recover these backups within the retention period, but they cannot alter or delete them. It’s important to note that deleted backups in immutable storage still count toward your backup storage quota. After the retention period, the data is permanently deleted, maintaining data integrity while meeting compliance requirements. This article will guide you through enabling and disabling immutable storage in Acronis, as well as configuring the available modes: Governance mode and Compliance mode.
Modes of Immutable Storage
- Governance Mode ensures that backup data cannot be tampered with or deleted by malicious actors. It keeps deleted backups in immutable storage for the set retention period, protecting data integrity for disaster recovery. In this mode, you can disable or re-enable immutable storage, adjust the retention period, or switch to Compliance mode.
- Compliance mode provides the same protections as Governance mode, but with stricter data retention requirements for regulatory compliance. Once enabled, immutable storage cannot be disabled, and the retention period cannot be changed. This mode is irreversible.
Configuring Immutable storage
Important: Two-factor authentication (2FA) is required to enable or disable immutable storage. To enable 2FA, go to Settings > Security in the management portal, set up an authenticator app, and follow the instructions to complete the setup.
We will provide you with two options to configure Immutable Storage. You can choose either of the following methods.
Log in to the Acronis Management Console
Login to the client area and navigate to Extra Services and click on (Managed) Acronis Cyber Protect Backup.
Next up, click on Access Backup Control Panel. Here, you will find the necessary login details to access the Acronis Management Console. Click on Click here to access Control Panel, this will redirect you to the login page for the Management Portal.
Enabling Immutable Storage in Acronis
Enabling via the Cyber Protection Console
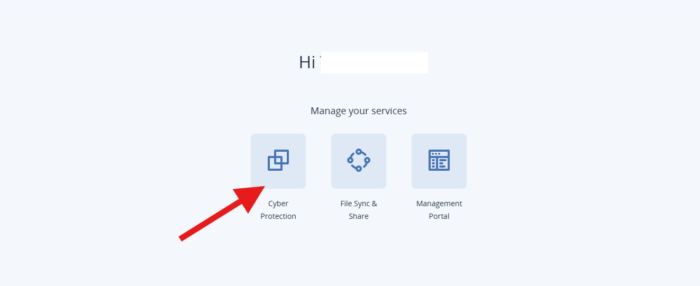
- Log in to the Acronis Management Console and select Cyber Protection.

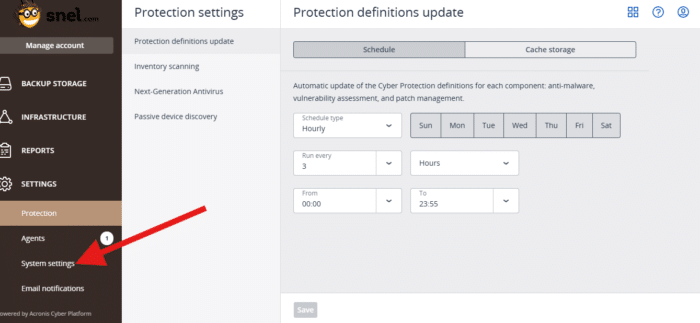
- Go to Settings > System settings.

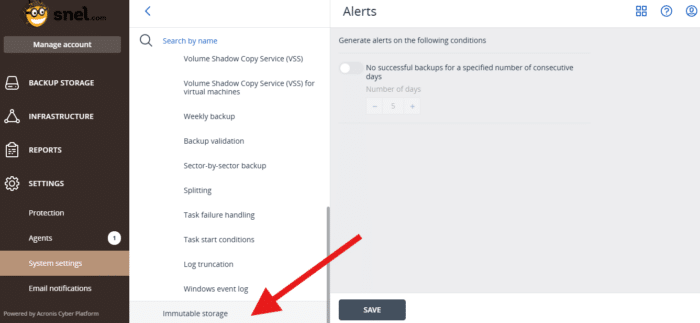
- Scroll through the list of default backup options and click Immutable Storage.

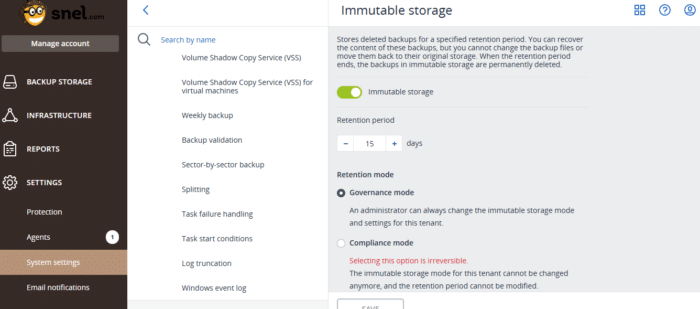
- Enable the Immutable storage.
- Specify a retention period between 14 and 365 days.
- Select the immutable storage mode and, if prompted, confirm your choice.

- Click Save.
Enabling via the Management Portal
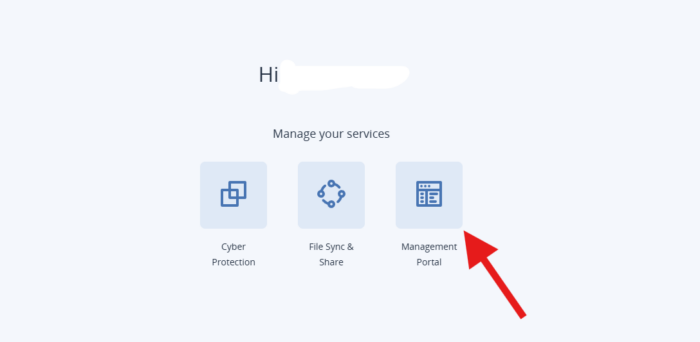
- Log in to the Acronis Management Console and select Management Portal.

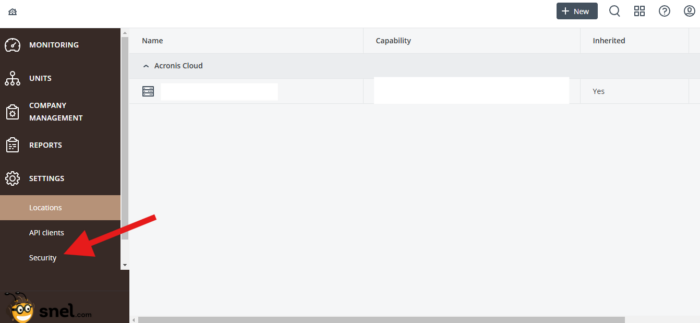
- Go to Settings > Security.

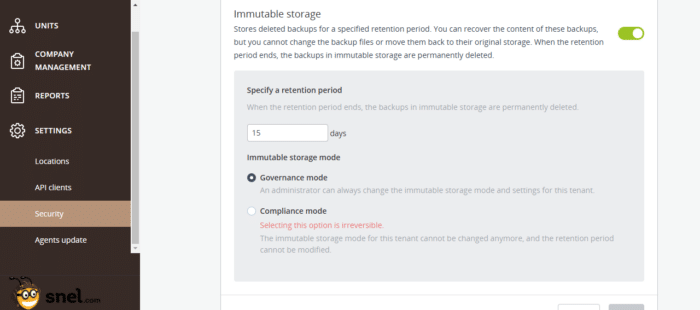
- Verify that the Immutable Storage switch is on green.
- Specify a retention period between 14 and 365 days.

- Select the immutable storage mode and, if prompted, confirm your choice.
- Click Save.
Disabling Immutable Storage in Acronis
Disabling via the Cyber Protection Console
- Log in to the Acronis Mangement Console and select the Cyber Protection.

- Go to Settings > System settings.

- Scroll through the list of default backup options and click Immutable storage.

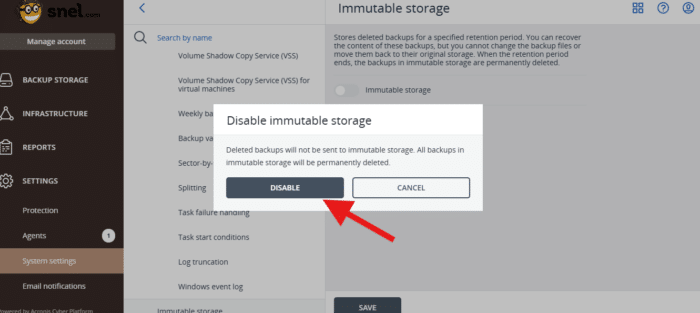
- Disable the Immutable storage and click on save.
- Confirm your choice by clicking Disable.

Disabling via the Management Portal
- Log in to the Acronis Management Console and select Management Portal.

- Go to Settings > Security.

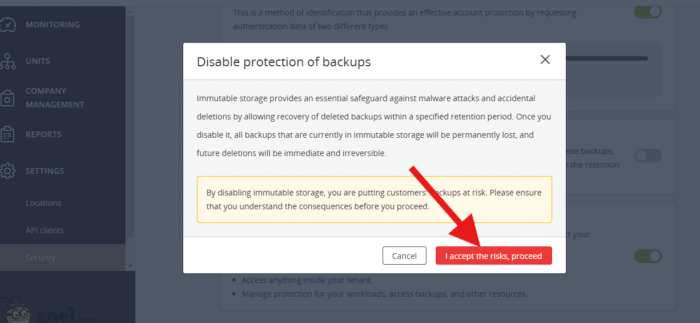
- Disable the Immutable storage.
- Confirm your choice by clicking Disable.
Conclusion
By following the steps outlined above, you can easily enable or disable Immutable Storage in Acronis, depending on your security needs. Whether you choose to manage this via the Cyber Protection Console or the Management Portal, both methods provide a seamless way to configure your backup protection. Remember, disabling immutable storage will initiate a 14-day grace period before backups are permanently deleted, ensuring data integrity during the transition. If you have any further questions or need assistance, feel free to reach out to our support team.




Leave a Reply