Introduction
This guide will help you set up our Secondary DNS Services in your server with DirectAdmin control panel. By the end of this tutorial, you will be able to manage your DNS records via your control panel. For more information about our Secondary DNS Services please click here.
Prerequisites
- Installed DirectAdmin control panel
- Snel.com – Secondary DNS Services
- This article is written for Plesk with BIND
- You need to have the SSH login details of your server ready
- You need to have the admin login details of your DirectAdmin Ready
Step 1 – Log in to DirectAdmin
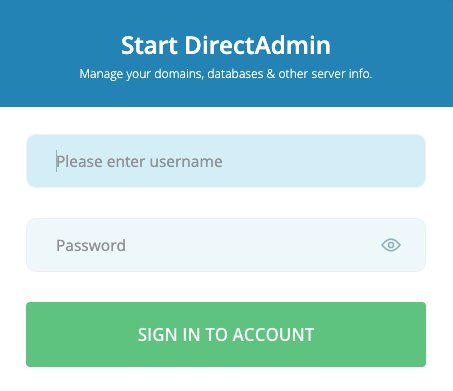
Log in to your DirectAdmin environment https://directadmin.example.com:2222
Step 2 – Configure Nameservers
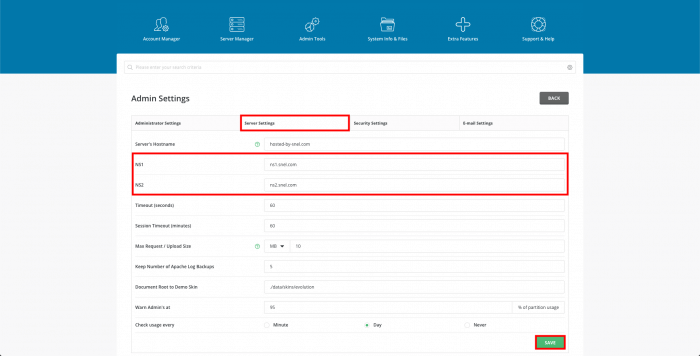
Open Server Manager and click on Administrator Settings.
Open tab Server Settings and replace NS1 and NS2 with the following values and click on SAVE
ns1.snel.com
ns2.snel.com
Step 3 – Log in with SSH
You need to log in as root or a user with root privileges. You can check this article for instructions on how to log in using SSH
Step 4 – Configure third nameserver
DirectAdmin does not support configuring the third nameserver through the webinterface, however you can setup a third nameserver as follows.
First of all create a custom template:
mkdir -p /usr/local/directadmin/data/templates/custom
cd /usr/local/directadmin/data/templates/custom
cp ../dns_ns.conf .
Next, open /usr/local/directadmin/data/templates/custom/dns_ns.conf in your favourite text-editor and add the following line to the bottom of it:
ns3.snel.com.=|DOMAIN|.
Step 5 – Configure BIND on the server
In order to apply the changes from DirectAdmin to the nameservers of Snel.com, you need to make changes in the following configuration file /etc/named.conf. In the configuration file find the options section which should be similar to the configuration below:
options {
	//listen-on port 53 { 127.0.0.1; };
	//listen-on-v6 port 53 { ::1; };
	directory 	"/var/named";
	dump-file 	"/var/named/data/cache_dump.db";
	statistics-file "/var/named/data/named_stats.txt";
	memstatistics-file "/var/named/data/named_mem_stats.txt";
	recursing-file  "/var/named/data/named.recursing";
	secroots-file   "/var/named/data/named.secroots";
	//allow-query     { localhost; };

	/*
	 - If you are building an AUTHORITATIVE DNS server, do NOT enable recursion.
	 - If you are building a RECURSIVE (caching) DNS server, you need to enable
	   recursion.
	 - If your recursive DNS server has a public IP address, you MUST enable access
	   control to limit queries to your legitimate users. Failing to do so will
	   cause your server to become part of large scale DNS amplification
	   attacks. Implementing BCP38 within your network would greatly
	   reduce such attack surface
	*/
	//recursion yes;

	dnssec-enable yes;
	dnssec-validation yes;

	/* Path to ISC DLV key */
	bindkeys-file "/etc/named.iscdlv.key";

	managed-keys-directory "/var/named/dynamic";

	pid-file "/run/named/named.pid";
	session-keyfile "/run/named/session.key";
};
Add the following lines in the options section
allow-transfer {
   89.207.128.251;
   2a00:7b80:476:ffff::1;
};
notify-to-soa yes;
Save the changes and verify that there are no syntax errors in the configuration file with the following command
named-checkconf /etc/named.conf
No output means no error, otherwise, you should resolve the errors.
Step 6 – Restart the Nameserver
Go back to your DirectAdmin environment https://directadmin.example.com:2222
Open Admin Tools and click on Service Monitor
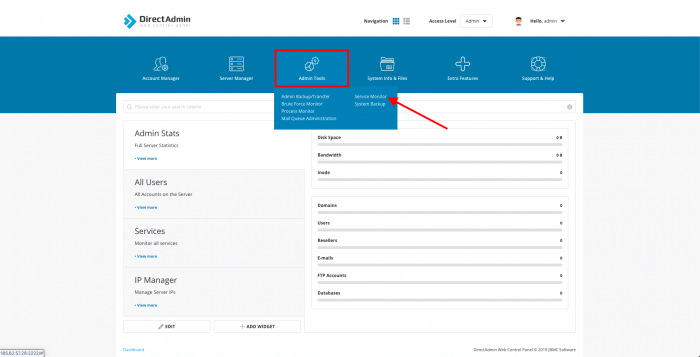
Restart named by clicking the plus + icon on the right side and click on Restart
Step 7 – Pre delegated domain check
In this step, we will add a domain into DirectAdmin and check the DNS configuration online. In our article we used sneltest.nl.
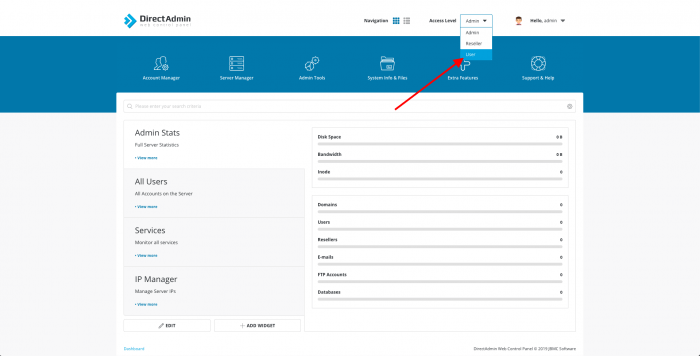
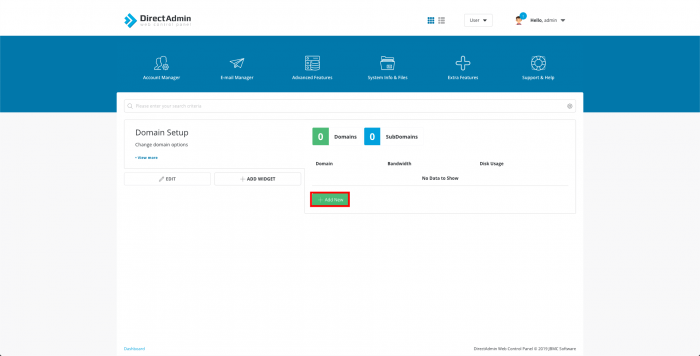
Add domain in DirectAdmin. Change DirectAdmin Access level from Admin to User
Click on Add New
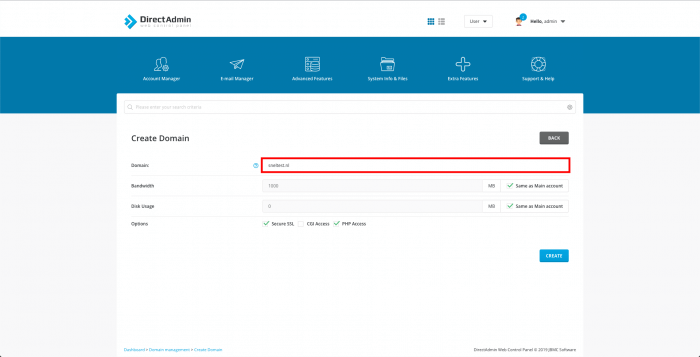
Fill in the domain section with the domain you want to test.
Once the domain is added, visit the website to check your DNS configuration. Add your domain in the zone.tld input field and the nameserver in our situation this is ns1.snel.com, ns2.snel.com, and ns3.snel.com. Once the information is filled click Test Now. The website will now generate a report of your DNS configuration. Your DNS configuration can be scored with three colors: Green, Orange, Red.
Green means that the DNS configuration is OK. If it’s orange or red it needs your ATTENTION!

Conclusion
Congratulations, you have configured our Secondary DNS Services on your DirectAdmin. You’re now able to apply the DNS changes (ADD/EDIT/DELETE) directly within your DirectAdmin without going to the control panel of the domain registrar.





Leave a Reply