Introduction
The Let’s Encrypt is an outstanding initiative from the Internet Security Research Group (ISRG) which is dedicated to all Plesk users to create a free SSL certificate and provide free encryption (SSL Certificate) for their domains. This free certificate authority(CA) has been formed by some renounce companies like Cisco, Mozilla, Akamai and more. Encrypt traffic between your server and the client web browser that usually something that you have to pay lots of money usually $20 per year and isn’t a full flesh SSL certificate that you can use for mail onto secure Plesk itself. Precaution is that Google has a policy about the search result if you have the unsecured traffic of the traditional HTTP going from the server to client browser then they may penalize you in a way, lowering your search result. If you have encrypted web traffic between the server and client web browser then you can higher rank. Thanks to Let’s Encrypt, it will provide full free encryption for your website. You can get it onto your Plesk server just within a few clicks.
Here, we are going to show you how to install the Let’s Encrypt extension on a Plesk based Linux and windows server.
Prerequisites
- Admin access to your Plesk server.
Things you should considerations before the installation
- Though it has a great impact, the certificate comes with a short validity time limit, only for 90 days.
- There may have issues on the production server because there may have bugs in both the extension and client.
Step 1: Log in to your Plesk Server
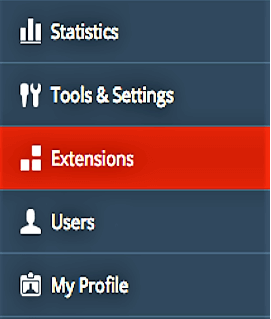
Login to your Plesk Server, the Plesk hosting control panel has appeared. Now Select “Extensions” from the menu bar.
Step 2: Open the extension catalog
Manage extensions console has already installed on your Plesk. From the manage extensions dialog select “Extensions Catalog”. A pop-up message will appear to notify you to choose the desired extension and to install it. Now you are able to see the extensions and here you will find the Let’s Encrypt extension.

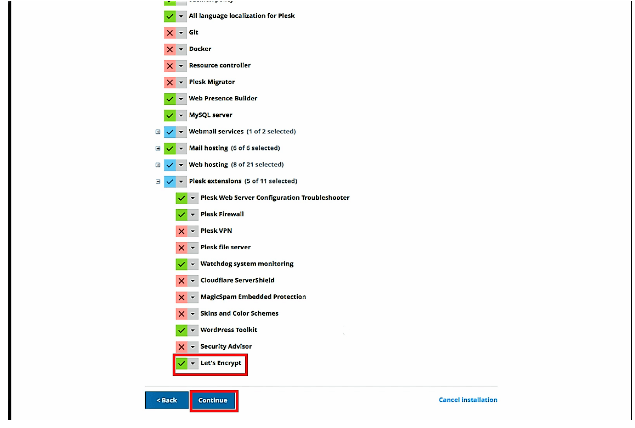
Note: If you are running your own server and Let’s Encrypt extension is not showing then from the menu bar select tools and settings. Then selects update and upgrade. That opens a new tab that’s the Plesk installer. Now you are able to see all the features come with Plesk. So on the bottom here you will find a box called Plesk Extension. Click plus icon on the Plesk extension and in the bottom, you will find Let’s Encrypt.
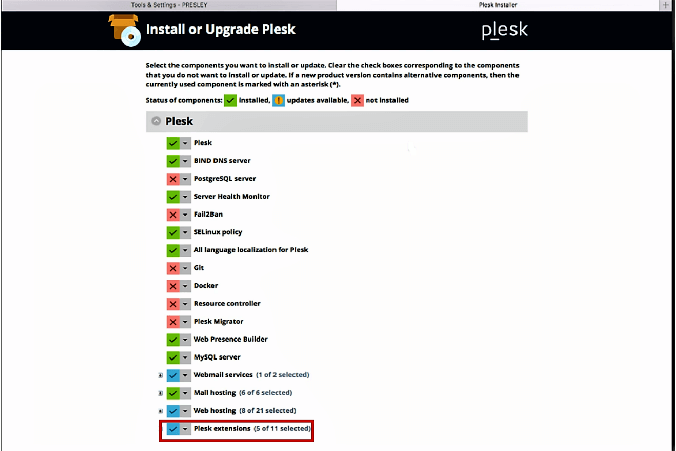
Now select the Let’s Encrypt extension and hit continue, you will able to see and use it.
Step 3: Install Let’s Encrypt for your server
Select Let’s Encrypt extension and click on install. It may take a few minutes. If the process is not going on then refresh and do again. Once the extension will install accordingly.

Step 4: Select domains
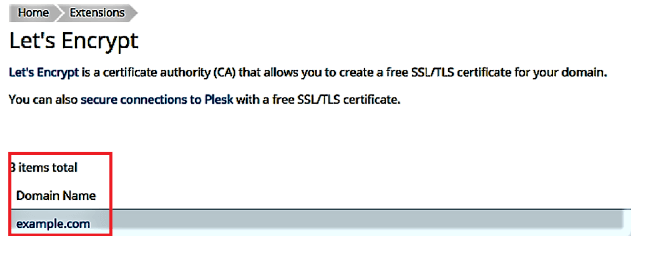
Click on the “Let’s Encrypt” extension then choose your desired domain name from the list of Plesk servers. As the domain will be validated, you need to ensure the selected domain is pointed at this server.
Step 5: Create your certificate
A dialog box will appear. Enter an email address for further recovery and getting notification form Let’s Encrypt. Now click install to create the free certificate.
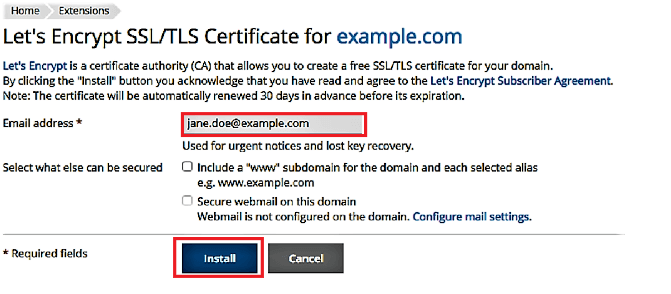
Once the process will complete automatically. Now you could see a success message by an interactive dialog.

Step 6: Enable SSL support
Select hosting setting from the menu bar and find the security section on the bottom. Now make sure the box adjacent to SSL/TLS ticked and check the Let’s Encrypt has been selected then save the setting.

Remember the certificate given by Let’s Encrypt is valid only for three months. You would have to renew it for sure but the machine will attempt to renew it on time automatically.
Conclusion
Congratulations, You have installed Let’s Encrypt Extension on Plesk successfully.


Leave a Reply