Introduction
Snel.com gives you the ability to install a custom operating system into a VPS. You can easily upload the ISO file and install the OS through your My.snel.com client area. ISO files are bootable disks which contain filesystem of CD/DVD, in our case, the operating system installer.
In this tutorial, we will go through how to upload ISO into My.snel.com client area and boot from it. We will also look at installing the OS through the console and detaching the ISO after installation.
Prerequisites
- A Virtual private Server (VPS) with Snel.com
- URL of a bootable OS ISO file.
Step 1: Upload Custom OS ISO File
Log in to your My.snel.com client area and open ISO List by selecting More and scrolling down.
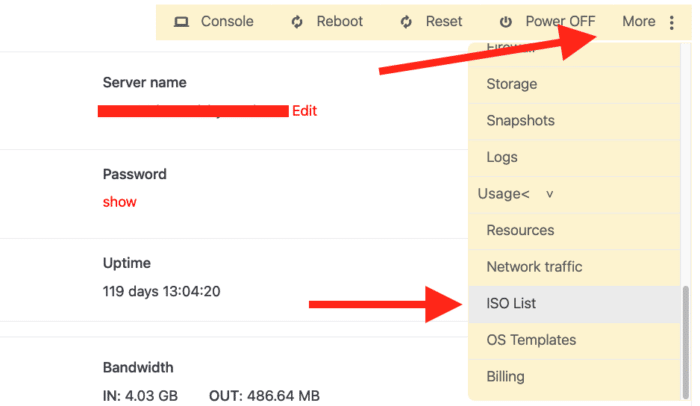
Now, click on the button Upload ISO.

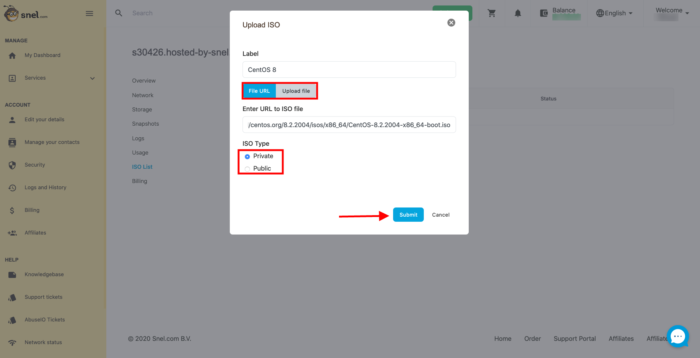
Provide a label for your ISO. It can be any identification name according to your choice. In URL to ISO file, provide a URL where your ISO file is stored. It should be a directly accessible URL without any authentication.
If your ISO file in on your local computer, use any file sharing service to upload your file on the internet and put the link of ISO in the pop-up.
Under ISO Type, if you select Private, ISO file will be available only to your account. If you choose Public, it will be available to other Snel users also.
In this example in the above screenshot, I have uploaded Fedora 30 Server Edition.
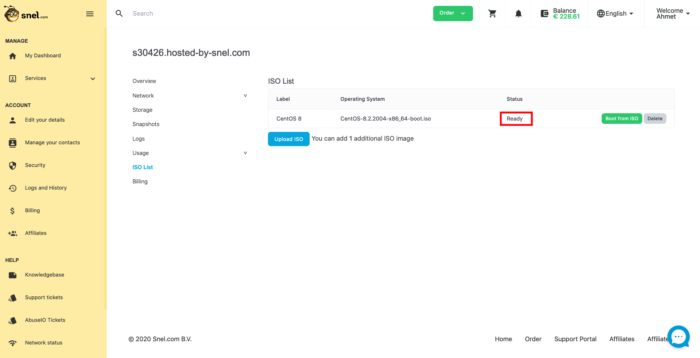
Once you click Submit, you may need to wait for a few minutes to up to an hour, depending upon the download speed of source server. Once the ISO file is uploaded to your account, you will see the Ready status on the ISO you uploaded.
Step 2: Boot from ISO file
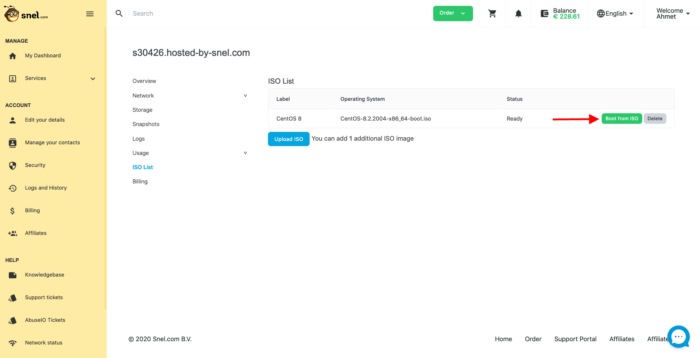
To boot from ISO you just uploaded, simply click on Boot from ISO button next to the ISO file.
This will restart the VPS and it will boot from the selected ISO file.
Step 3: Install the Operating System
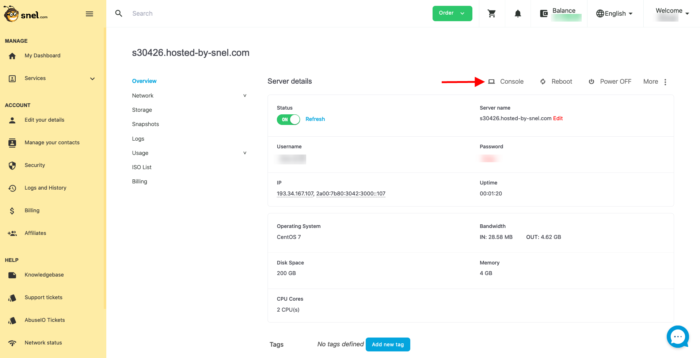
Once you have booted the system from ISO, return the dashboard of your VPS server. Click on Console icon on the dashboard.
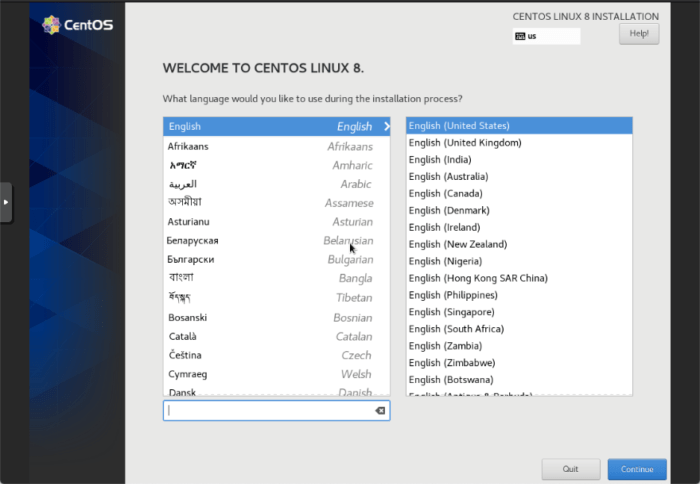
You should see the installation screen according to the ISO you uploaded. For example, I can see the Fedora 30 installation screen.
Use the console screen to complete the installation and set up SSH or Remote access according to your use-case. Once your operating system is installed, proceed to next step.
Step 4: Detach ISO
Since we have booted from ISO, this caused the boot order to change. It is currently configured to boot from CD/DVD as the first priority. We need to detach the ISO file so that our server can boot from the disk.
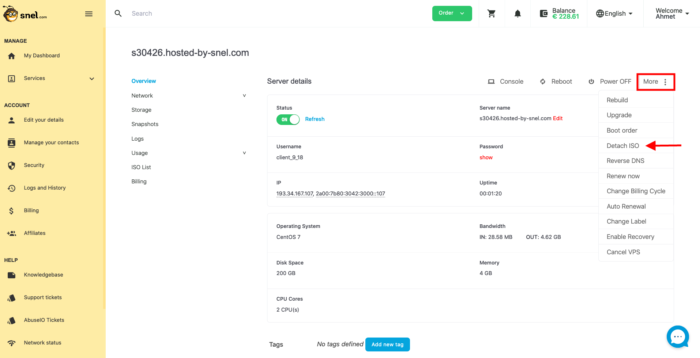
Return to the overview dashboard of your VPS and click on the icon Detach ISO.
This will put back the default boot order for your VPS and the VPS will be booted from the disk. You can always use the console to troubleshoot any error with your VPS.
Conclusion
In this tutorial, we have learned how to install a custom operating system on Snel Cloud VPS of Pure Performance VPS. We looked at how to upload the ISO file and boot from ISO file. We also looked at installing the OS using the console and detaching the ISO after the installation.



Leave a Reply