Introduction
Gitlab CE or Community Edition is an open-source application used to host your Git repositories. It offers you the advantage of keeping the data on your server for your team and your clients. It offers you total control of your codebase while providing an easy to use interface for you and your team members.
In this guide, we will cover how to install your Git repository using Gitlab’s free offering, the Community Edition. Gitlab also offers paid versions of the software which offer advanced features like Merge approvals, Roadmaps, Portfolio Management, Disaster recovery, Container scanning and lots more. You can upgrade to it if you want those.
Prerequisites
- An Ubuntu 18.04 based server with a non-root sudo user and a basic firewall. You can follow our tutorial for doing the same. Even though the tutorial was written for Ubuntu 16.04, the steps are the same for 18.04.
- You need a VPS with minimum 2 CPU cores and 8GB RAM according to the specified hardware requirements for Gitlab CE which will support 100 users. Even though you can substitute swap space for RAM, it is not recommended since the application will run slower.
Step 1 – Installing Dependencies
Before we begin to install Gitlab, you will need to make sure your server has certain software installed so that Gitlab can run properly. Run the following commands to install the dependencies.
$ sudo apt update
$ sudo apt install ca-certificates curl openssh-server ufw apt-transport-https -y
Some of the software above may be pre-installed for you.
Next, you will need postfix to send notification emails. If you want to use another solution, then skip this step and you can configure an external SMPT server after you have installed Gitlab.
$ sudo apt install postfix -y
For the postfix installation, select Internet Site when prompted. Enter the domain name you are going to use for your Gitlab server on the next screen.
Step 2 – Configure Firewall
Before proceeding ahead, we need to configure the ufw firewall we installed in the previous step. Before we enable and configure the firewall, we need to enable SSH so that we don’t get locked out of our server.
$ sudo ufw allow OpenSSH
It is safe now to enable the firewall. Just enter y when presented with the prompt.
$ sudo ufw enable
We need to enable http, https, and Postfix for Gitlab to operate.
$ sudo ufw allow http
$ sudo ufw allow https
$ sudo ufw allow Postfix
We need to check the status that everything is working fine.
$ sudo ufw status
You should see the following output which will tell you everything is working fine.
Status: active

To                         Action      From
--                         ------      ----
OpenSSH                    ALLOW       Anywhere
80/tcp                     ALLOW       Anywhere
443/tcp                    ALLOW       Anywhere
Postfix                    ALLOW       Anywhere
OpenSSH (v6)               ALLOW       Anywhere (v6)
80/tcp (v6)                ALLOW       Anywhere (v6)
443/tcp (v6)               ALLOW       Anywhere (v6)
Postfix (v6)               ALLOW       Anywhere (v6)
Step 3 – Add the repository and install Gitlab
Run the following command to add the following repository.
$ curl https://packages.gitlab.com/install/repositories/gitlab/gitlab-ee/script.deb.sh | sudo bash
Install the Gitlab CE package. Replace example.github.com with the domain you will be using for your Gitlab install. If you want Gitlab to automatically install an HTTPS certificate for you using Let’s Encrypt, choose https in the command below. If you want to use your certificate or don’t want to use https, use HTTP below.
$ sudo EXTERNAL_URL="https://gitlab-server.example.com" apt-get install gitlab-ee
Even though we talked about the community edition in the beginning, yet we are installing the Enterprise edition here. It is because, if in future you need to upgrade to the paid version, it can be done via a single click. If you install the community edition, then to switch to the enterprise edition you will need to do a manual upgrade which can lead to downtime. Enterprise edition without the license will behave just like the Community edition and is the recommended way to install.
Step 4 – Run the Installer
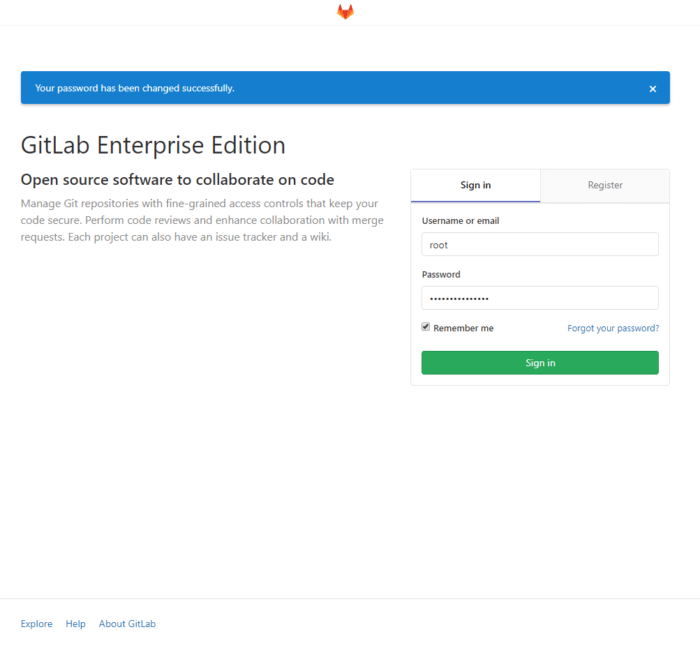
Navigate to the URL chosen in the previous step in your web browser. You will be redirected to Gitlab’s password reset screen. Provide a password for Gitlab Administrator’s account.
Step 5 – Configure Postfix
This tutorial will just enable Postfix for sending transactional emails. If you want to run a full-fledged mail server capable of handling incoming and outgoing mails, then you will need to do a lot more configuration which is out of the scope of this tutorial. Gitlab Docs provide a good way to start where you can learn how to configure Postfix for receiving mails.
First, we need to check the hostname for our machine. This is the name you were probably asked before you had set up your server. If you want, you can change it here. We have chosen gitlab-server for our purposes.
$ sudo nano /etc/hostname
Exit the editor by pressing Ctrl + X. Now we need to set a host file.
$ sudo nano /etc/hosts
Replace example.com and 165.22.194.39 with your domain name and IP address respectively.
127.0.0.1		 	localhost
127.0.0.1			gitlab-server
165.22.194.39 		gitlab-server.example.com gitlab-server
Press Ctrl + X to exit when you are done and enter Y for saving the changes.
Install Mailutils. If for some reason you haven’t installed postfix in step 1, this will install it for you. Mailutil will allow us to send mails via command line.
$ sudo apt install mailutils
We need to make few changes to Postfix’s configuration file (/etc/postfix/main.cf). For this, we will use the Postconf tool. The -e parameter tells postconf to make changes in the main.cf file.
$ sudo postconf -e 'relayhost = [smtprelay.snel.com]:587'
$ sudo postconf -e 'smtp_tls_security_level = may'
$ sudo postconf -e 'myhostname = gitlab-server.example.com'
First, all outgoing mails will go via Snel’s SMTP server. Second, the TLS security level is set to may which means TLS will be used if the remote server supports it or else plaintext will be used. This ensures delivery to mail servers that don’t have TLS enabled. And last, the hostname entry is set to the domain name you chose earlier.
Restart Postfix.
$ sudo service postfix restart
Test the email sending functionality.
$ echo "This email confirms that Postfix is working" | mail -s "Testing Postfix" [email protected]
If you receive an email at your domain, it means Postfix is working perfectly. If you don’t want to use Postfix and want to go with a simple SMTP server, proceed to Gitlab Docs on how to configure.
Step 6 – Configure Gitlab Profile
Log in to your Gitlab installation. Click on the user icon on the upper right-hand corner to bring up the drop-down menu and select settings.
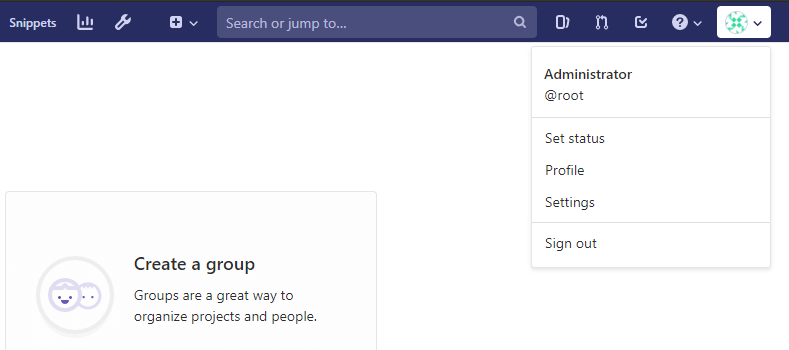
You will be taken to your Profile settings page. Add your name and e-mail here. You will need to confirm your email address for it to be updated. You can also add more information here about yourself if you want.
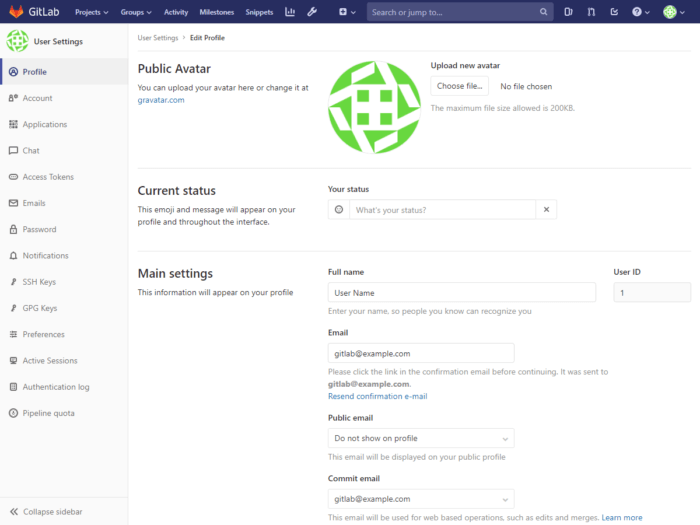
Click Update Profile Settings when you are done.
Step 7 – Change User Name
Next, we need to change our username from root to something else as root is a pretty common guessable username. Click on Account in the left sidebar.
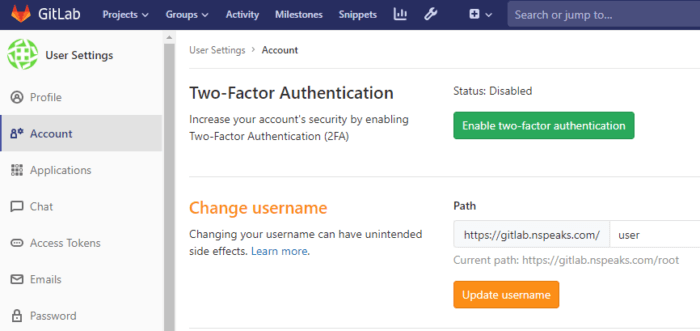
Change the user to whatever username you want to keep. Click on Update username to finish. You should also enable two-factor authentication here for more security.
Step 8 – Restrict Sign-ups
By default, Gitlab installations allow anyone to sign up. If you don’t want that, you should disable it. Click on the wrench looking icon in the top bar to access the Administration area.
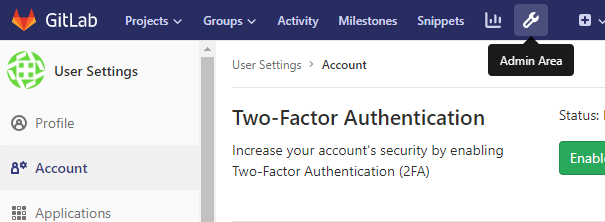
To adjust settings, click on Settings in the left sidebar.

Here, scroll down to the Sign-up restrictions and click on the Expand button. Uncheck the Sign-up enabled box and click on Save changes when finished.

You will still be able to add new users via the Admin interface. This will disable only public signups.
Step 9 – Add SSH Key
The last step is adding our SSH key. If you have an SSH key, you can skip the following command. If you don’t have one, you can create one using the following command.
$ ssh-keygen
This command is common to Mac OS, Linux and Git Bash/WSL on Windows. Accept the defaults and provide a password when asked for to secure the key.
Generating public/private rsa key pair.
Enter file in which to save the key (/c/Users/<Username>/.ssh/id_rsa):
Enter passphrase (empty for no passphrase):
Enter same passphrase again:
Your identification has been saved in /c/Users/<Username>/.ssh/id_rsa.
Your public key has been saved in /c/Users/<Username>/.ssh/id_rsa.pub.
The key fingerprint is:
SHA256:j8Pd5kXM04+tFoppivHaYN5gjYE95Rd4Fc4YXz2MqYE <Username>@WIN10DESKTOP
The key's randomart image is:
+---[RSA 3072]----+
|          o o.=. |
|         E O + o.|
|        o + *   .|
|     o o . o o . |
|    . + S .   = .|
|       * = . ..+.|
|      B = ooo.o.o|
|     + O .+o.... |
|      +.=o  ...  |
+----[SHA256]-----+
You can display your public key via the following command
$ cat ~/.ssh/id_rsa.pub
4FwcEp0IE7XW5yHDin/uyt5rxbZzNwQlg33+b453ocBS18tsUbqoJfgS7C2QcP/iWct0QpiY9BcLJ6GL6JolUQQmFm1TV5M29hFjT9pHe95QBXm1MfZH+yO6Fqz9fUf6isFYQbPJyZrJMpTu31opKiU50YB3I2UG6oyIpJedutXDqPln6f+HazL1eK7KqreghnnrN1vpyxPU7qoWT307yknii74zizqUKebfpaePGiFuT/q/MgI5LmV9pSLIz2PWjTxRgrblmEZem847SiBw0JVhm1q2D3wv7EOsQBm1HConl8FEewuQNw5KcQxj4gxuBUWFPmbI7f2cGtjQj9XR6bSSPvowoDmS+BR6r1sT+ppJgS/Oe50MnzlmgJq4joTRUaONJ+Oe0= <Username>@WIN10DESKTOP
Go back to your Profile’s Settings area and access SSH keys from the sidebar.
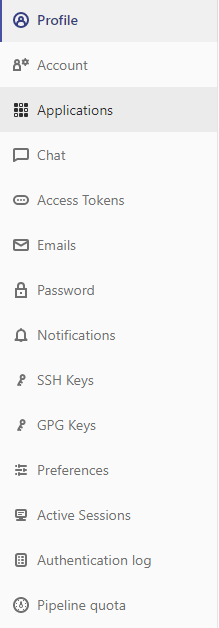
Paste the SSH key in the box provided and click on Add Key to proceed.
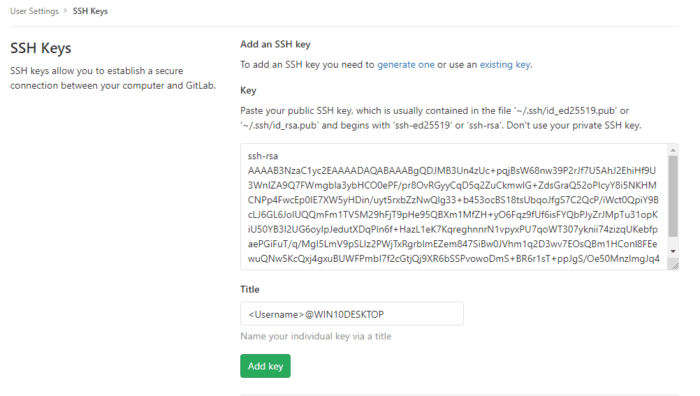
Now you can create and commit to your repositories without having to provide your Gitlab credentials.
Conclusion
Congratulations, you should now be able to create projects and repositories on your own Ubuntu 18.04 server using Gitlab.


Leave a Reply