Introduction
By taking snapshots you can preserve the state of your VPS. This feature comes handy when you are upgrading the software on your VPS or you made some mistake and accidentally deleted all your application files. When you take a snapshot, an image of the disk at that time is created. You can also take a snapshot of your server’s memory. When you restore the snapshot, you get the exact same state of your VPS when you created the snapshot
In this tutorial, we will go through how to take snapshots on demand or configure a schedule to take snapshots automatically. We will also go through how to pin the critical snapshots and how to restore the snapshots. We will also see how to increase the snapshot quota of your VPS.
Prerequisites
- A VPS from Snel.com. This tutorial applies to all VPS plans.
Step 1: Log in to your client area
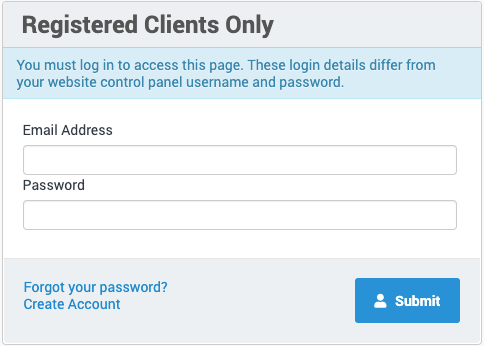
Log in to your client area via https://my.snel.com/clientarea/.

Step 2: VPS Selection
Click to the VPS that you want to create/restore/delete/pin a snapshot.
Step 3: Take a VPS Snapshot
To take a snapshot on demand, navigate to Snapshots tab in your VPS dashboard and click on Create a new snapshot button.
On the snapshot pop up, provide a snapshot name and description. Selecting Memory checkbox will also take a backup of the RAM of your VPS.
Click on Create Snapshot button to create a snapshot. Wait for a few minutes and refresh the snapshot page. You should see the snapshot on the snapshot tab.
Step 4: Automatic Snapshots using Schedule
If you want to automatically take a snapshot of your VPS periodically, you can also configure automatic snapshots.
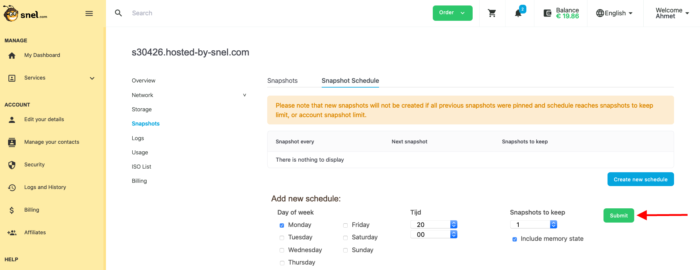
Click on Snapshot Schedule under Snapshot tab on your VPS dashboard. Now, click on Create new schedule button. Here, you can specify when to take the automatic snapshot.
Step 5: Pinning a Snapshot
If you created a schedule, then your existing snapshots will be overridden if they are not pinned. Pinned snapshots are never deleted automatically.
To pin a snapshot, you can simply click on the toggle button under pinned column in your desired snapshot row.
Step 6: Restoring a Snapshot
In case things go wrong in your VPS and you wish to restore a snapshot. You can easily do so by clicking the Restore button in the snapshot row.

Step 7: Purchasing Additional Snapshots
In case you want to increase the number of snapshots you can take and store, you will need to purchase them.
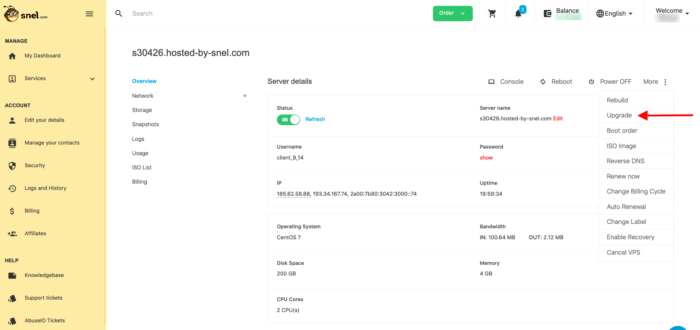
To purchase additional snapshots quota, click on the upgrade icon on your VPS overview page.
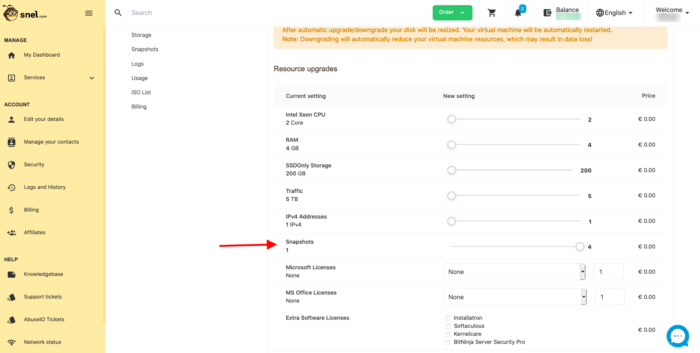
Under VPS Upgrade interface, slide the snapshot bar to the desired number your snapshots you want.
Complete the checkout and you can immediately start using the additional snapshots that you have purchased.
Conclusion
In this tutorial, we have learned how to manage the snapshots in my.snel.com client area You can now easily take a VPS snapshot whenever you want. You also learned how to configure automatic snapshots, pin critical snapshots, and also how to restore a snapshot.


Leave a Reply