Introductie
PhpMyAdmin is een volledig gratis en open source web gebaseerd MySQL / MariaDB-beheer softwareprogramma dat is geschreven in PHP. Het is voor gebruikers een eenvoudige manier om via een webbrowser met MySQL te communiceren. In deze tutorial leggen we jou uit hoe je phpMyAdmin kunt installeren op je server en beveiligen voor veilig gebruik en het bewaken van jouw databases.
In deze tutorial leggen we uit hoe je phpMyAdmin installeert en beveiligt, zodat je het veilig kunt gebruiken om je databases vanuit een Linux-systeem te superviseren.
Wat je zult leren
In dit artikel leer je hoe je PhpMyAdmin installeert. Het programma is een bekend doelwit voor aanvallers omdat de standaardinstallatie bijna geen beveiliging heeft.
Vereisten
Download de huidige phpMyAdmin-broncode (4.8.2) en pak het uit op jouw server. Mocht je de software niet kunnen vinden dan kun je het hier downloaden. Deze versie van phpMyAdmin is compatibel met PHP> = 5.5 en MySQL> = 5.5.
Stap 1: Download de laatste phpMyAdmin
~ $ cd /var/www/example.com/
~ $ wget https://files.phpmyadmin.net/phpMyAdmin/4.8.2/phpMyAdmin-4.8.2-all-languages.zip
~ $ unzip phpMyAdmin-4.8.2-all-languages.zip
~ # mv phpMyAdmin-4.8.2-all-languages phpMyAdmin
Je hebt nu phpMyAdmin gedownload het is nu belangrijk dat je de rechten corrigeert.
~ $ chown -R www-data:www-data /var/www/example.com/phpMyAdmin
~ $ chmod -R 655 /var/www/example.com/phpMyAdmin
Stap 2 – Stel Nginx in voor phpMyAdmin
Je hebt nu de rechten in stap 1 geconfigureerd. Je kunt nu verder met de configuratie van Nginx. De Nginx-configuratie moet in het domein bewerkt worden. Ons Nginx-configuratie-bestand bevindt zich op /etc/nginx/site-available/example.com
location /phpMyAdmin {
root /var/www/example.com/;
index index.php index.html index.htm;
location ~ ^/phpMyAdmin/(.+.php)$ {
try_files $uri =404;
root /var/www/example.com/;
fastcgi_param SCRIPT_FILENAME $document_root$fastcgi_script_name;
include fastcgi_params;
fastcgi_intercept_errors on;
fastcgi_pass php;
}
location ~* ^/phpMyAdmin/(.+.(jpg|jpeg|gif|css|png|js|ico|html|xml|txt))$ {
root /var/www/example.com/;
}
}
location /phpmyadmin {
rewrite ^/* /phpMyAdmin last;
}
Stap 3 – Herstart Nginx
Nadat je de Nginx-configuratie hebt gewijzigd, is het van belang dat je Nginx opnieuw gaat laden zodat de wijzigingen kunt toepassen. Voordat je opnieuw gaat laden, is het belangrijk dat je de Nginx-configuratie op fouten controleert. Je kunt dit controleren met behulp van onderstaande commando:
~ $ nginx -t
# nginx: the configuration file /etc/nginx/nginx.conf syntax is ok
# nginx: configuration file /etc/nginx/nginx.conf test is successful
Als het configuratiebestand geen fouten bevat, dan kun je de wijzigingen toepassen door Nginx opnieuw te laden.
~ $ systemctl reload nginx
Stap 4 – Toegang tot phpMyAdmin
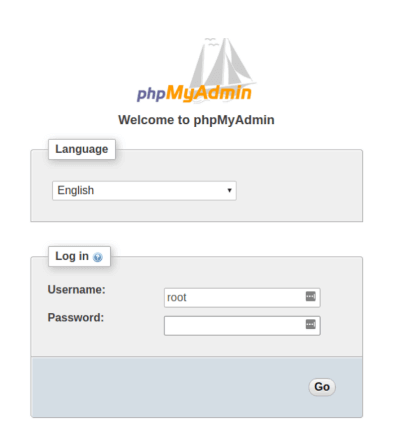
Je hebt toegang tot jouw phpMyAdmin via jouw browser, bezoek onderstaande url: https://www.example.com/phpMyAdmin

Gefeliciteerd, je hebt met succes phpMyAdmin geïnstalleerd voor jouw website.
Step 5 – Beveilig jouw phpMyAdmin
De phpMyAdmin-omgeving is geconfigureerd, echter ben je nog niet klaar. Je zult nu extra beveiligingsmaatregelen moeten toevoegen om jouw phpMyAdmin-omgeving te beschermen.
Om te beginnen, kun je de basisverificatie inschakelen voor jouw phpMyAdmin-omgeving. Begin met het bewerken van jouw Nginx-configuratie, voeg de onderstaande regels toe in het serverblok van jouw Nginx-configuratie-bestand.
auth_basic"Login";
auth_basic_user_file/etc/nginx/.htpasswd;
Zodra je dit aan jouw configuratie hebt toegevoegd, kun je een gebruiker aanmaken om toegang te krijgen tot phpMyAdmin.
~ $ htpasswd /etc/nginx/.htpasswd exampleuser
New password:
Re-type new password:
Adding password for user exampleuser
Je hebt de gebruikersnaam een wachtwoord aangemaakt om toegang te krijgen tot de phpMyAdmin-omgeving. Om de basisverificatie in te schakelen voor de bezoekers, moet je het Nginx-configuratie-bestand aanpassen. Voeg de onderstaande regels toe aan jouw Nginx-configuratie.
satisfy any;
allow 127.0.0.1
deny all;
De Nginx-configuratie is nu gewijzigd, controleer eerst de Nginx configuratie op fouten.
~ $ nginx -t # nginx: the configuration file /etc/nginx/nginx.conf syntax is ok
# nginx: configuration file /etc/nginx/nginx.conf test is successful
Als het configuratiebestand geen fouten bevat, dan kun je de wijzigingen toepassen door Nginx opnieuw te laden:
~ $ systemctl reload nginx
Stap 6 – Bevestig de wachtwoordverificatie
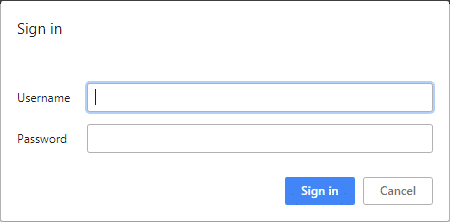
Om te controleren of jouw phpMyAdmin goed is beveiligd, is het van belang dat je de website bezoekt. Als het goed is zie je nu een popup waar je jouw gebruikersnaam en wachtwoord moet invullen. Dit betekent dat je een succesvolle installatie hebt uitgevoerd.

Conclusie
Gefeliciteerd, je hebt nu een phpMyAdmin geconfigureerd die is beveiligd met Basis Authenticatie.


Geef een reactie